October 13, 2020

Escalante Natural Bridge

The Trail

This easy trail is 2.2 miles (one-way) with only a 145 ft. elevation change. However, it does go directly through the river five times up to where we stopped. If you cross the river to get under the bridge, that is an additional crossing. To go there and back, be prepared to cross the river ten to twelve times total. Hiking sandals/water hiking shoes will work well for this.

Topographical Map

Graph of Elevation

Trail in Google Earth


The trail starts at a sign saying that you are entering the Escalante Canyon and that there is not really a trail. However, we found a pretty clear trail the entire way despite what this sign stated on the matter. In fact, hikers should do their best to stay on the existing path and particularly avoid going off into sandy off-trail areas. We noticed a number of areas of cryptobiotic soil along the trail, and in many places these delicate areas had footprints going through them. Please stay off of the cryptobiotic soil.

Trailhead

After only venturing a few yards down the sandy trail, hikers will meet their first river crossing. These crossings were not particularly deep while we were there, but there is not any ready way to get across them without getting your feet wet.


As the trail continues up the river, hikers are rewarded with beautiful views of the Navajo sandstone cliffs and slickrock domes that cap them. Depending on the time of year, you may also witness an abundance of wildflowers, lush green foliage fed by the river's waters, or the brilliant color of yellow fall leaves along the trail. There are some intriguing views of the red canyon walls and some other interesting rocks along the way.


Not long before reaching Escalante Natural Bridge, those who look up will be able to catch a glimpse of Skyline Arch high up on the canyon walls. I understand you can also hike much closer to it if you continue a short ways past where we stopped to view the ruins and accompanying petroglyphs. It is said to be about a half mile from the natural bridge.

Skyline Arch in distance

Escalante Natural Bridge pops into view soon after this above the trees, and continuing along the trail takes hikers right up to this alluring rock feature. Cross the river here to walk up under the sandstone bridge.


Continue another .04 miles to reach the Anasazi ruins. There is a social trail heading up off the main path that will take adventurers closer to these ruins and up to a petrogyph panel. Appreciate the artwork here, but please be respectful of the petroglyphs by not touching them or defacing the panel in any way.


After coming back down from the panel, you can continue up the canyon or you can return the way you came. This section of trail is about 16 miles long from the trailhead to Escalante. A short ways up from the panel is Skyline Arch, as previously mentioned, and Sand Creek, a tributary that descends down another beautiful narrower canyon.


Dogs are permitted on this trail, but be aware that there are no restroom facilities at the trailhead. Please be respectful of nearby private property as well.

Directions

This trail is located in Garfield County not far from Boulder, Utah. It is also not far from Escalante, Utah. From Boulder, the trailhead is about 12.5 miles south along Hwy 12 just before crossing the Escalante River. The trailhead will be just down a dirt road to the right before crossing the river. It is not well marked from the road. To get there from Escalante, drive about 14.5 miles along Hwy 12 from the middle of the town to the Escalante River and find the trailhead on the left right after crossing the river. GPS coordinates: N37° 46.545' W111° 25.174'


October 12, 2020

Panorama Trail in Kodachrome Park to Cool Cave

The Trail

This easy 3 miles trail (one-way) only has a 131 ft. elevation change. It is part of a larger tail system that is often done as a loop, but we just went to the cave and back the same way. Cool Cave was our favorite spot along the trail in any case.

Topographical Map

Graph of Elevation

Trail in Google Earth


The trail starts across the street from the dirt parking area and sets off across a landscape strewn with rock spires reminiscent of oddly shaped pipes and twisted upended carrots. It starts by dropping some into a cut bank.

Trailhead

Trail descending into cut bank

After traveling only 0.4 miles, the trail splits, as indicated by the first blue trail on the topographical map above. Heading left will take you around toward Panorama Point before heading back toward the cliffs to the north and connecting back to the trail shown via one of the other two trail segments shown in blue. The trail map below gives a fuller picture of this (map taken from the Kodachrome Basin State Park Map and Guide):

To go the direction shown on the map, stay right and keep along the cliffs to the north. Do not take one of the other confusing side trails heading off to the left either, but remain along the cliffs. This will take hikers to Indian Cave 0.6 miles up from the trailhead. This pleasant alcove has numerous hand print impressions around it, some quite deep.

Indian Cave

Next, hikers will come to Ballerina Spire 0.8 miles from the trailhead which somewhat resembles a dancer's leg with pointed toe at its top, and then to Hat Shop one mile from the trailhead with its baseball-cap-like top on one of the spires.


Hat Shop


A half mile later, and 1.5 miles from the trailhead, those exploring this trail will have the option to turn off to a loop dubbed The Secret Passage. This loop is about 0.4 miles long and offers views of some uniquely pyramidal shaped rocks. We also made our way back along a wash where we found some interesting pockets in the rocks, one of which appeared to boast its own odd sandcastle inside.

Secret Passage Turn-off

Pyramid shaped rock along Secret Passage Trail

Shallow canyon area along the wash

Sandcastle formation inside a rock pocket

Shortly after the Secret Passage is another option to turn off from the trail along the cliffs and head south toward Panorama Point, and in another half mile there is yet another option for this. (If you turn left at this second option, you will shortly arrive at Mammoth Geyser, the tallest and thickest of the "pipes" along the trail. There are also some intriguingly weathered hills near this second trail junction.


Those willing to head straight another mile past the Secret Passage (not following the turn-offs marked as heading back to the trailhead) will reach Cool Cave. Near the entrance to this cave stands an interesting spire that reminded us of the horse used for knight chess pieces.

Cool Cave is reached by following the path along a wash down a canyon and around a bend. After a small easily climbed pour-off, explorers will find themselves in an enclosure that is something of a large alcove that is not actually an fully enclosed cave. It still feels cavernous through in its design complete with bumpy dirt and sandstone formations on its sides. The space offers a definite drop in temperature as well. At the far end a narrow steep slot canyon can be viewed at the top of an impassable dryfall, which obviously forms a waterfall during flash floods.

Approaching Cool Cave

Small Pour-off to climb up into the "cave"

Looking up the dryfall


Leaving Cool Cave

Upon leaving Cool Cave, you have the option to take the trail going left to complete a short loop before connecting to the trail you followed up this way. This is only a little longer than just going back the way you came. We did not head this way though, so it is not shown on our own topographical map.

This trail is open to horses and leashed dogs. Please stay on the trail and avoid cryptobiotic soil, as you should throughout this entire section of country. There are no bathrooms at the trailhead, but there are restrooms avaliable at the visitor's center. A fee is required to access the area.

Directions

This trail is located in Kodachrome State Park, which is found in Garfield County near Cannonville, Utah. To get there from Hwy 12, turn south onto Kodachrome Rd./Main St. in Cannonville. Turn left onto Kodachrome State Park Rd. Continue past the Visitor's Center to the parking for the Panorama/Grande Parade Trail. The trailhead is across the parking lot (whereas the Grade Parade Trail starts from the parking area). GPS Coordinates: N37° 31.377' W111° 59.505'

October 11, 2020

Peek-a-boo Canyon and Spooky Glutch Loop

The Trail

This slightly technical (in that it involves some small climbs/rock scrambles) moderate loop trail is about 5 miles round trip with a roughly 250 ft elevation change. There is a fair amount of up and down however within the loop, so keep this in mind when considering the elevation change. Be aware that Spook Gulch is quite narrow with long sections that are only about a foot wide, making exploration of this slot canyon inaccessible and/or prohibitive for some people. There are a couple places that require some small rock climbs/descents/scrambles as well. As you should with any slot canyon, be sure to check weather forecasts before you go and don't attempt the canyons if there is a chance of rain or flash flooding.

Topographical Map

Graph of Elevation

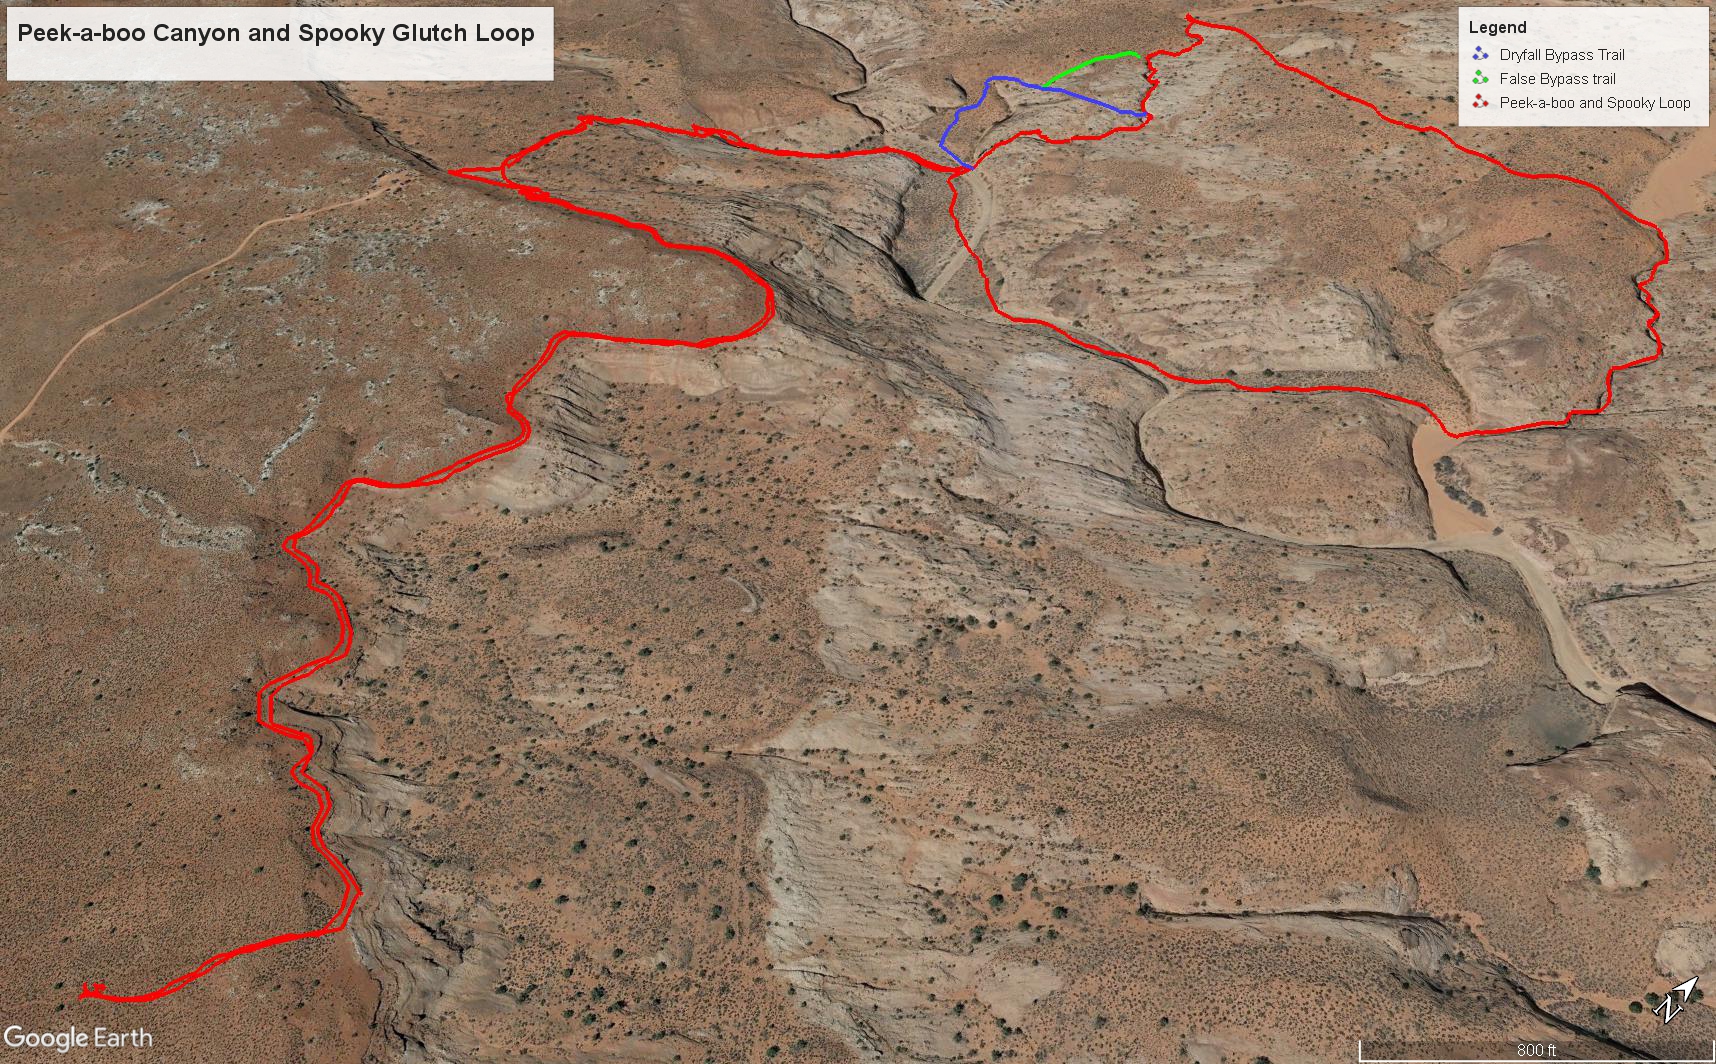
Trail in Google Earth

The trail from the dirt parking lot heads out for a mile along an easy trail before meeting a sign marking the turn-off to descend to the slot canyons (marked by the green circle in the topographical map above). During this section you can enjoy some nice views of the area and see Peek-a-boo Canyon and Spooky Gulch below if you know where to look. Please be especially mindful in this area to stay on the trail to avoid trodding through crytobiotic soil. This is something to be careful about throughout the entire trail and while traveling anywhere in this area.

Note that this starting point is new as of February this year; hikers used to be able to park closer to this turn off point, as can actually be seen in the Google Earth image above. (This image doesn't even show the parking area where you actually start from now.)

Look out for the sign and rock cairns on your right after the first mile of the trail or else you will miss them and continue following the Rim Trail.

Trailhead

Map at trailhead

Looking south along the Rim Trail

Turn-off from Rim Trail down to
slot canyons


Looking up at turn-off point from below

After descending steeply, the trail flats out after turning east as it continues down into the wash below. At the bottom of this section a sign points different directions for the various slot canyons.

Continue along this rock wall
to the large wash


Going around the loop clockwise is recommended in order to avoid a more difficult climb up in Spooky Gulch. This is also the more common way to approach the trail, making navigating the squeeze through Spooky easier in order to avoid running into others going the opposite direction where there is no room for passing. However, some people go up one, back down, and then up and down the other as well or do the loop counterclockwise.

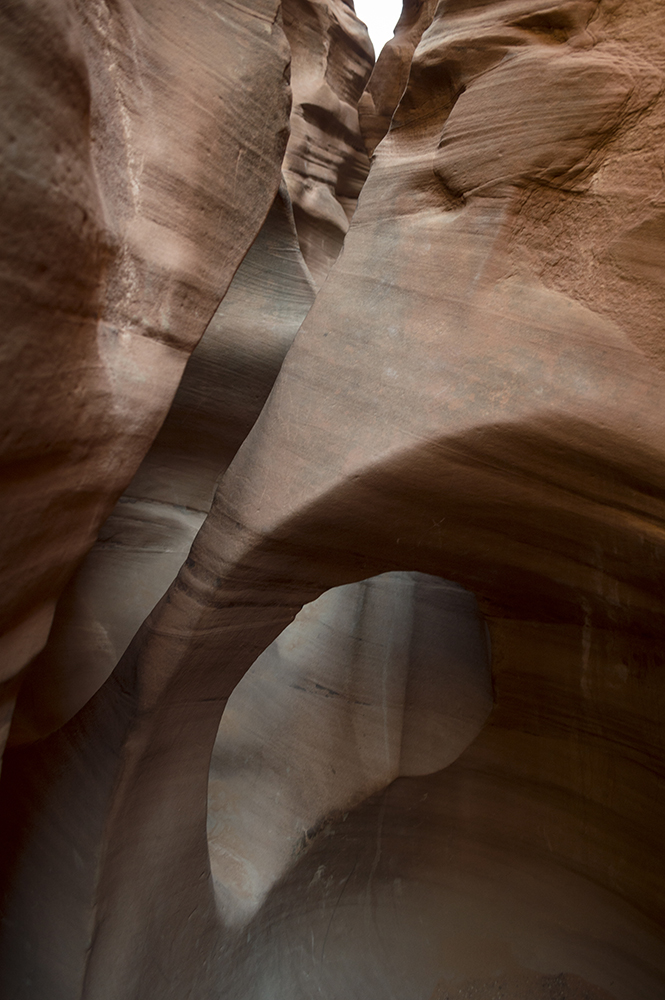
The entrance to Peek-a-boo is large and obvious. There is about a 15 ft climb here to get up and into the canyon, but some footholds carved into the rock help with the ascent. Those good at rock scrambling will not find this difficult, but it can be a bit daunting for some. Having a small group to help boost and pull people up can help. Almost immediately after the climb up you will start seeing the incredible arches this canyon is known for. Be ready to twist and weave your way through and around the various formations within the canyon.

Entrance to Peek-a-boo Canyon

Person in front of the climb for scale

Alternatively, there is a bypass into Peek-a-boo if you know where to find it. This path is marked in blue on the maps above. To get there, head west from the entrance along the wash toward the Dry Fork Narrows. After a short distance you will see a path to your right heading up out of the wash. Take this path, follow it around to a rock hill, and follow the rock cairns up this steep rock hill to a place where you can easily get into the canyon. Note that there are some confusing paths that go in the wrong direction in this area. If you don't follow the cairns and go up, you will probably find yourself along the more obvious green dirt path shown above that leads to an overlook of the slot canyon but does not present a good way into it.

Trail bypassing the climbing ascent

Entrance to Dry Fork Narrows from the bypass trail

If you do take the bypass, be sure to climb back toward the main entrance of Peek-a-boo before continuing further north up the canyon in order to enjoy the unique arches and twists this canyon is well known for! Just be prepared to wind, twist, and crawl through the snake-like turns of the canyon and the unique archways found there.


As the canyon opens up, you can actually continue up the wash to explore the north part if desired. However, to complete the loop commonly done, there is a path heading east that is well used and easy to find that will take hikers over to Spooky Gulch.

Wash continuing further up Peek-a-boo Canyon

Path heading to Spooky Gulch

 About 0.4 mile after the turn-off, hikers will arrive at Spooky Gulch. This first part of the canyon is easy to get down into and relatively wide. There is also an arch along this section.

Entering Spooking Gulch

Arch in Spooky Gulch

Soon enough, hikers will come to a rock jam blocking easy progress down the canyon. There is a hole to one side of this group of choke stones that can be descended in a 10-15 foot drop. This section is more difficult to ascend/descend than the climb going up into Peek-a-boo. We found a rope left there to assist other hikers, but as is always best practice, test any rope left there to make sure it is trustworthy before using it to bear your weight during a climb or descent.

Rock Jam

Climb down from rock jam

Looking up at the top part of the rock jam

Rock jam from below

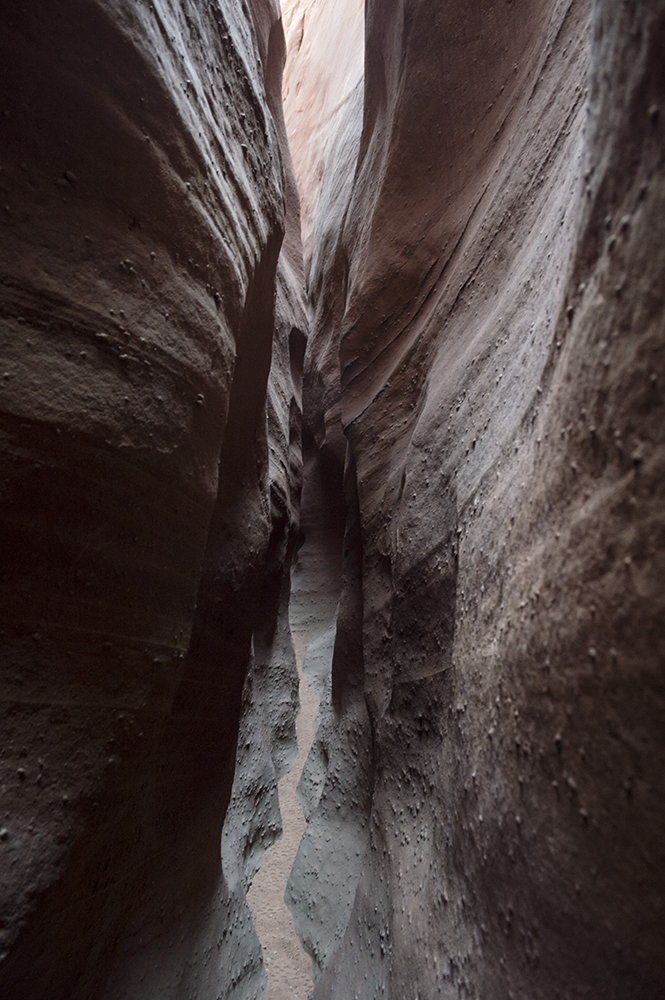
After descending the rock jam, the canyon narrows significantly. Adventurers will find themselves twisting and turning through much tighter spaces than those found in Peek-a-boo. You will have to travel sideways to get through many places, and it is also possible to get your feet jammed in some tight spots. If you are planning on doing this section of Spooky, be advised that it will be difficult to impossible if you are a very large person or if you have a large pack.


After exiting the canyon, the trail turns out into the wash. From there a trail can be taken back toward Peek-a-boo and up to the trailhead by following the path and the rock cairns. For those with additional time, a turn left to head further down the wash will take you to explore Brimstone slot canyon.

Trail heading back


This trail allows dogs, but unless your furry companion is a great climber, this is probably not the best trail for him/her. There are vault toilets available at the trailhead.

Directions

This trail is located in Garfield County near Escalante, Utah. To get there take UT-12 to Hole in the Rock Rd. Travel down Hole in the Rock Rd. for for just over 26 miles and turn left. Note that Hole in the Rock Rd. is a rough washboard dirt road, so it will take some time to get down it to the trailhead in most vehicles. While it is doable in regular passenger cars with high enough clearance, a four wheel drive vehicle may make it easier and faster. Weather conditions may also potentially make travel along this road inadvisable. A sign does mark the turn off from Hole in the Rock Rd to the trailhead, but it is helpful to pay attention to mileage to make sure you don't miss it. From here just continue to follow the dirt road to the parking area and trailhead. GPS Coordinates: N37° 28.251' W111° 12.767'