Showing posts with label Technical. Show all posts

June 05, 2021

Long Bow Arch Trail/Bow and Arrow Route

The Trail

This moderate trail is 1.3 miles long one-way to get to Long Bow arch with a 430 ft. elevation change. It involves a number of other points of interest along the way as well from dinosaur tracks to petroglyphs. This trail is shown in blue on the maps below. However, for those wishing to do the Bow and Arrow canyoneering route, a 2.5 mile loop can be made past Long Bow arch, down the rest of the canyon, and then walking back up the road to the trailhead. This technical route is shown in red in the map below and involves 4 rappels, marked by the blue flags.


Topographical Map (Blue=Long Bow Arch Trail; Red= Bow
and Arrow Route)
Graph of Elevation (Long Bow stops at 1.3 miles in)

Trail in Google Earth

This trail starts at the Poison Spider Trailhead (an ATV road) at the opposite side of the parking area. It starts out with some switchbacks climbing up first to a panel of dinosaur prints and then past a few petroglyphs.

At the trailhead for Poison Spider

Long Bow Arch Trailhead

Dinosaur Foot Prints

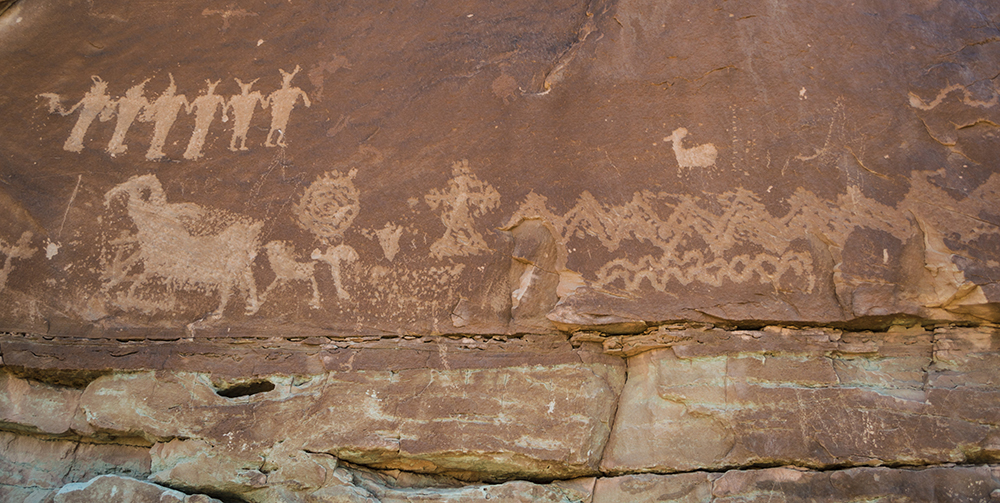
Petroglyphs

Keep your eyes out of additional petroglyphs along this trail; there are many, but I didn't take pictures of all of them. From here, continue along the side of the rock wall until you reach a small narrow arch. The trail heads right up below the arch via some metal pieces that have been bolted in the rock here to create a ladder of sorts.

Trail heading up by small arch

Small arch from opposite side

After heading past the arch, follow the green painted marks on stone to stay on the trail. The area opens up into a wide canyon before heading west into a narrower canyon. As the trail turns off, Long Bow Arch is visible ahead.

Trail through open canyon area

Approaching Long Bow Arch from trail

Long Bow Arch sits 1.3 miles from the trailhead. It pulls out gently from the rock wall behind it while boasting about 60-80 foot long span.


For those hiking the trail, simply turn and head back along the trail the way you came after enjoying the arch. Dogs are permitted on this trail, and there is a vault toilet at the trailhead.

For those wanting to engage in some canyoneering, continue up the canyon to the technical sections. Soon you will come to a high point and then start to descend. Shortly after the start of the descent, adventurers will arrive at the first short rappel point.

Looking down the canyon. Across the way
are other cool places to explore like
Pool Arch. Further back are the
La Sal Mountains.

Three tenths of a mile later, you will arrive at the anchor for the second rappel point, which consists of about a 120 ft. drop.

Looking out at the top of the second rappel point

Looking at the second rappel from
its bottom

Continuing down the canyon, in a additional two tenths of a mile there is a low angle 60 ft rappel. Very shortly after, you will come to the final rappel, which is roughly 75 ft.

Small pool along the route.

Looking down the low angle rappel. Right
after this one is the last rappel down to
the road.

Final Rappel

From the bottom of the last rappel, you can make your way up the road back to the trailhead. It is roughly a half mile walk.

Directions

This trail is located near Moab, Utah in Grand County. To get there from Moab, head north on US-191 and turn southwest onto UT-279. Continue for 5.9 miles on this road until you come to the trailhead on your right. The road curves around and there is a dirt parking area here. The trail starts on the far north side of the parking lot. GPS Coordinates: N38° 31.960' W109° 36.533'

June 04, 2021

Rock of Ages/Pool Arch Route

The Trail

This moderate technical route requires some class three climbing/rock scrambling and involves 2-3 rappels. The canyoneering route is about a 4.5 mile loop with about a 727 ft. change in elevation.

Topographical Map
Graph of Elevation

Trail in Google Earth

This trail starts up Pritchett Canyon ATV Road (requiring a fee to cross the private ground in front of this road). After a half mile, adventurers must turn left up the narrow side canyon. Head up this canyon, watching out for poison ivy as you go. The canyon appears to dead-end from a distance, but as you get closer it becomes apparent that you can climb up this gully and continue.

Trail Entrance - entrance fee paid here to cross private land

Pritchett Canyon ATV Road - head up this
for about a half mile

Turn off for Rock of Ages Route into
side canyon

Looking back down on the climb up
the narrow gully


There is a fairly clear trail that continues here. As always in this sort of terrain, be sure to stay on the trail and/or rocks to avoid destroying cyrptobiotic soil along the way. Look back along the way to see this jug handle arch.

Walking up a ways further will bring adventurers to another gully to climb up.


Another spot to climb up

As the terrain opens up more, you will come upon the first spot to rappel about two miles into the trail. You can see the spot in the first picture below where a group is waiting below to descend. Right behind the rappel spot sits Pool Arch. There is webbing on a tree here set up for the rappel, but you could also use one of the other trees nearby (as we did since a very large group was using the first tree).

Coming up to the first rappel

Pool Arch

Alternatively, the first rappel can be avoided by keeping right to climb down a gully to pool arch as explained here. In fact, using this gully to go up and down to retrieve ropes is recommended in order to avoid rope grooves.

If you do choose the route going down the rappel, it is about a 130 ft/40 meter drop. (That being said, I have seen other places saying it is closer to 160 ft., but according to our GPS it is much closer to the places that have said 130 ft.) After the descent, make your way through the narrow V opening in the rocks under the arch and into the pool of water. Wade or swim off to the left to continue the route.

First Rappel

Head through the V opening into the
pool of water


As you come out of the pool, continue east for a short distance before turning south into the canyon that will then loop back in a westward direction.

Looking east after the pool. Don't continue on in this
direction; turn south.

The canyon narrows significantly and leads through some tight spots requiring a bit of maneuvering to comfortably pass.

Bridging across this pool works best

We found it easiest here to not use the
hanging strap but to sit on the second
knob and slide over to the foothold on the
other side. Climb down and wade
through the water.

After 0.4 mile from the first rappel, you will reach the second rappel point, a drop of about 50 ft/15 meters. Anchors are set up in the middle of this for rappelling. From this point, the route heads through a beautiful, more open, high walled canyon area.


Flowering Prickly Pear

In another 0.4 mile from the second rappel, you will arrive at the final rappel point. There are multiple anchor options for this rappel, the higher ones requiring a bit more rope than the lower. The lower anchor involves climbing down a bit to find off to the right side. This rappel down to an alcove is about 100 ft/30 meters, but plan on some extra rope for the higher point.

Final rappel point


From here, simply continue following the path out of the canyon and back to Pritchett Canyon, then walk down the ATV road back to the trailhead.


Looking back into canyon where route exits

Heading back down Pritchett Canyon

Directions

This trail is located near Moab, Utah in Grand County. To get there from US-191, turn and onto Kane Creek Blvd., located on the south end of Moab, and head west. Continue for 3.8 miles on this road until you come to the trailhead for Pritchett Canyon on your left. This is located shortly before the road turns to dirt. There is parking here, and more parking about 0.1 mile up the road.

Alternatively, if you are already coming from the north side of Moab, turn off onto 500 West, and then turn right onto Kane Creek Blvd. and continue as explained above. GPS Coordinates: N38° 32.112' W109° 35.977'

October 11, 2020

Peek-a-boo Canyon and Spooky Glutch Loop

The Trail

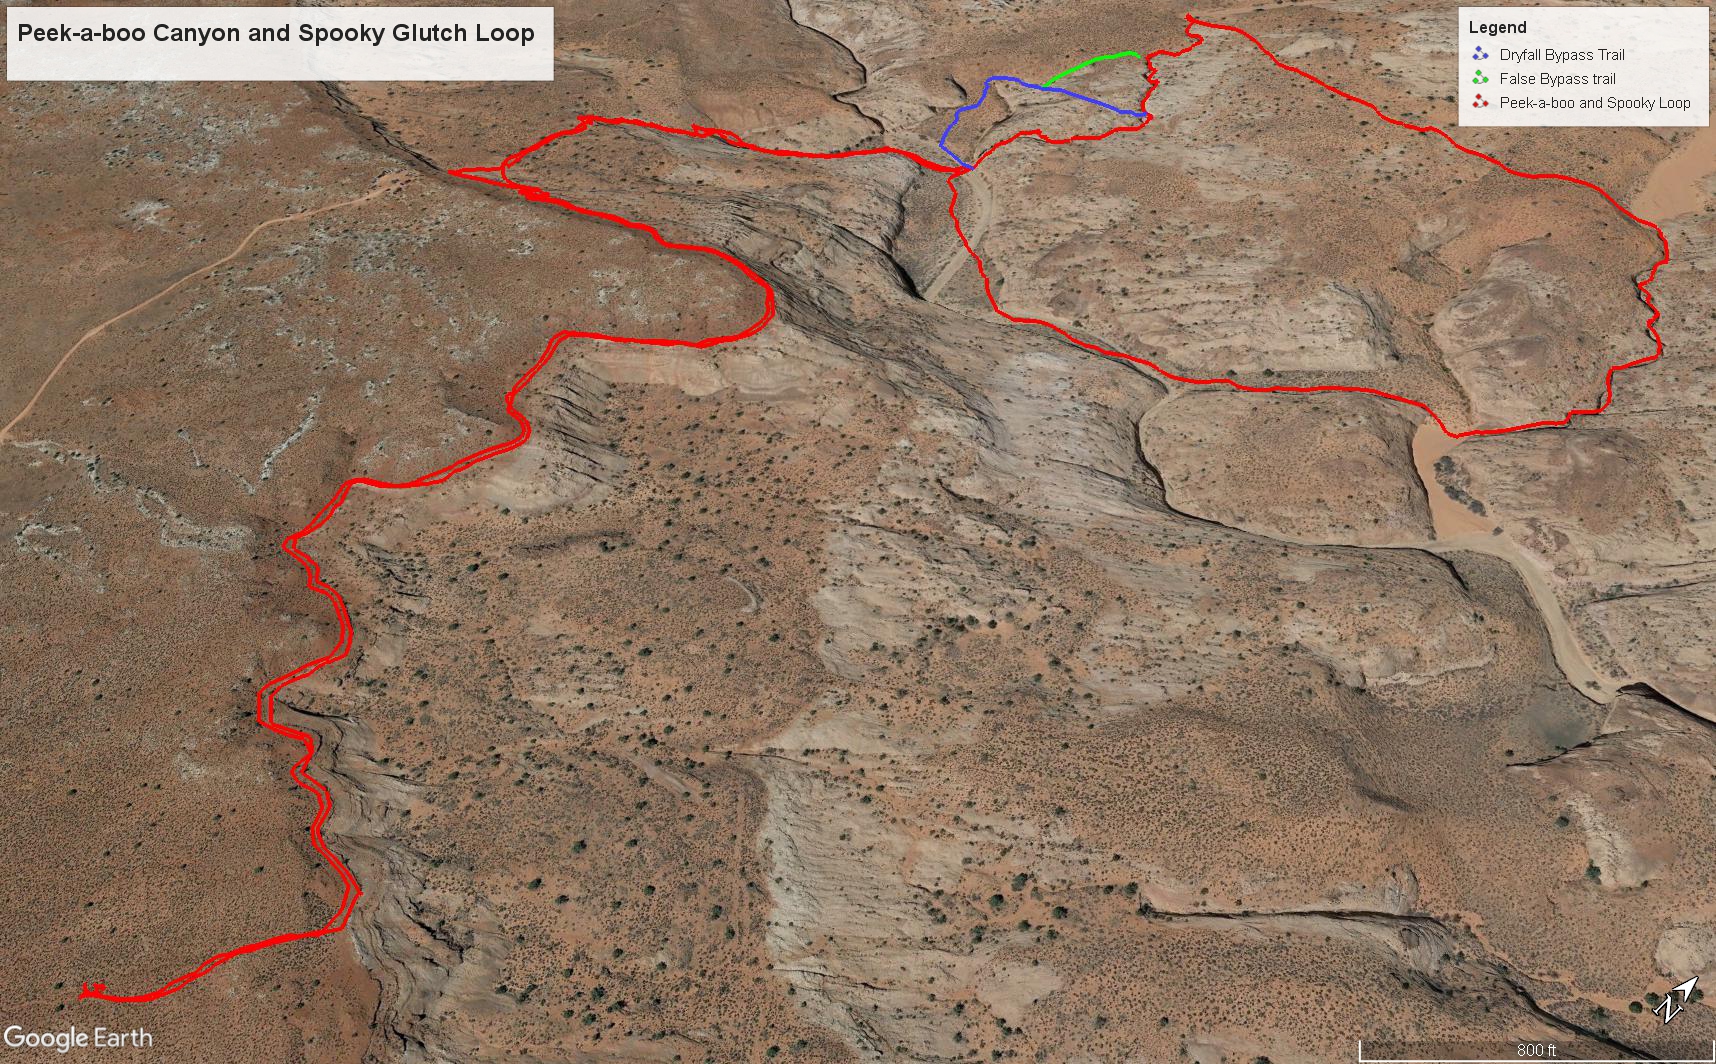
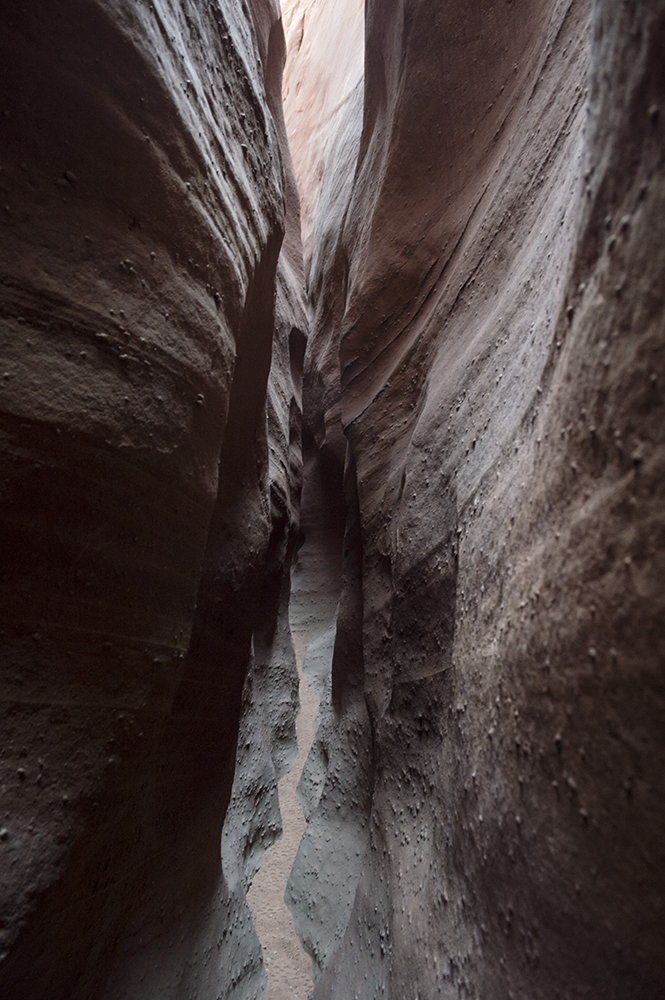
This slightly technical (in that it involves some small climbs/rock scrambles) moderate loop trail is about 5 miles round trip with a roughly 250 ft elevation change. There is a fair amount of up and down however within the loop, so keep this in mind when considering the elevation change. Be aware that Spook Gulch is quite narrow with long sections that are only about a foot wide, making exploration of this slot canyon inaccessible and/or prohibitive for some people. There are a couple places that require some small rock climbs/descents/scrambles as well. As you should with any slot canyon, be sure to check weather forecasts before you go and don't attempt the canyons if there is a chance of rain or flash flooding.

Topographical Map

Graph of Elevation

Trail in Google Earth

The trail from the dirt parking lot heads out for a mile along an easy trail before meeting a sign marking the turn-off to descend to the slot canyons (marked by the green circle in the topographical map above). During this section you can enjoy some nice views of the area and see Peek-a-boo Canyon and Spooky Gulch below if you know where to look. Please be especially mindful in this area to stay on the trail to avoid trodding through crytobiotic soil. This is something to be careful about throughout the entire trail and while traveling anywhere in this area.

Note that this starting point is new as of February this year; hikers used to be able to park closer to this turn off point, as can actually be seen in the Google Earth image above. (This image doesn't even show the parking area where you actually start from now.)

Look out for the sign and rock cairns on your right after the first mile of the trail or else you will miss them and continue following the Rim Trail.

Trailhead

Map at trailhead

Looking south along the Rim Trail

Turn-off from Rim Trail down to
slot canyons


Looking up at turn-off point from below

After descending steeply, the trail flats out after turning east as it continues down into the wash below. At the bottom of this section a sign points different directions for the various slot canyons.

Continue along this rock wall
to the large wash


Going around the loop clockwise is recommended in order to avoid a more difficult climb up in Spooky Gulch. This is also the more common way to approach the trail, making navigating the squeeze through Spooky easier in order to avoid running into others going the opposite direction where there is no room for passing. However, some people go up one, back down, and then up and down the other as well or do the loop counterclockwise.

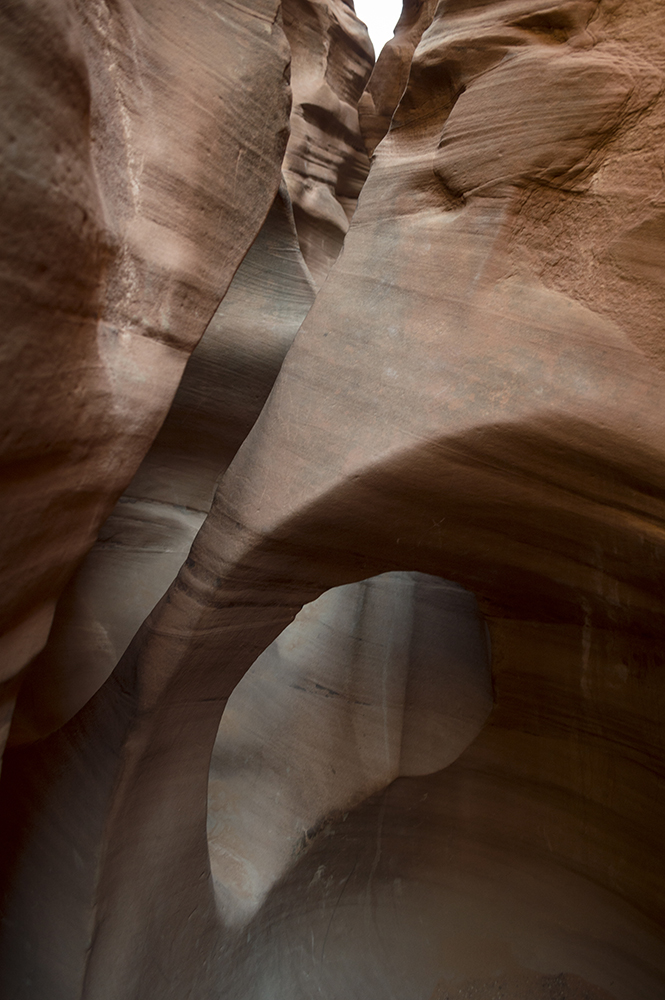
The entrance to Peek-a-boo is large and obvious. There is about a 15 ft climb here to get up and into the canyon, but some footholds carved into the rock help with the ascent. Those good at rock scrambling will not find this difficult, but it can be a bit daunting for some. Having a small group to help boost and pull people up can help. Almost immediately after the climb up you will start seeing the incredible arches this canyon is known for. Be ready to twist and weave your way through and around the various formations within the canyon.

Entrance to Peek-a-boo Canyon

Person in front of the climb for scale

Alternatively, there is a bypass into Peek-a-boo if you know where to find it. This path is marked in blue on the maps above. To get there, head west from the entrance along the wash toward the Dry Fork Narrows. After a short distance you will see a path to your right heading up out of the wash. Take this path, follow it around to a rock hill, and follow the rock cairns up this steep rock hill to a place where you can easily get into the canyon. Note that there are some confusing paths that go in the wrong direction in this area. If you don't follow the cairns and go up, you will probably find yourself along the more obvious green dirt path shown above that leads to an overlook of the slot canyon but does not present a good way into it.

Trail bypassing the climbing ascent

Entrance to Dry Fork Narrows from the bypass trail

If you do take the bypass, be sure to climb back toward the main entrance of Peek-a-boo before continuing further north up the canyon in order to enjoy the unique arches and twists this canyon is well known for! Just be prepared to wind, twist, and crawl through the snake-like turns of the canyon and the unique archways found there.


As the canyon opens up, you can actually continue up the wash to explore the north part if desired. However, to complete the loop commonly done, there is a path heading east that is well used and easy to find that will take hikers over to Spooky Gulch.

Wash continuing further up Peek-a-boo Canyon

Path heading to Spooky Gulch

 About 0.4 mile after the turn-off, hikers will arrive at Spooky Gulch. This first part of the canyon is easy to get down into and relatively wide. There is also an arch along this section.

Entering Spooking Gulch

Arch in Spooky Gulch

Soon enough, hikers will come to a rock jam blocking easy progress down the canyon. There is a hole to one side of this group of choke stones that can be descended in a 10-15 foot drop. This section is more difficult to ascend/descend than the climb going up into Peek-a-boo. We found a rope left there to assist other hikers, but as is always best practice, test any rope left there to make sure it is trustworthy before using it to bear your weight during a climb or descent.

Rock Jam

Climb down from rock jam

Looking up at the top part of the rock jam

Rock jam from below

After descending the rock jam, the canyon narrows significantly. Adventurers will find themselves twisting and turning through much tighter spaces than those found in Peek-a-boo. You will have to travel sideways to get through many places, and it is also possible to get your feet jammed in some tight spots. If you are planning on doing this section of Spooky, be advised that it will be difficult to impossible if you are a very large person or if you have a large pack.


After exiting the canyon, the trail turns out into the wash. From there a trail can be taken back toward Peek-a-boo and up to the trailhead by following the path and the rock cairns. For those with additional time, a turn left to head further down the wash will take you to explore Brimstone slot canyon.

Trail heading back


This trail allows dogs, but unless your furry companion is a great climber, this is probably not the best trail for him/her. There are vault toilets available at the trailhead.

Directions

This trail is located in Garfield County near Escalante, Utah. To get there take UT-12 to Hole in the Rock Rd. Travel down Hole in the Rock Rd. for for just over 26 miles and turn left. Note that Hole in the Rock Rd. is a rough washboard dirt road, so it will take some time to get down it to the trailhead in most vehicles. While it is doable in regular passenger cars with high enough clearance, a four wheel drive vehicle may make it easier and faster. Weather conditions may also potentially make travel along this road inadvisable. A sign does mark the turn off from Hole in the Rock Rd to the trailhead, but it is helpful to pay attention to mileage to make sure you don't miss it. From here just continue to follow the dirt road to the parking area and trailhead. GPS Coordinates: N37° 28.251' W111° 12.767'